Upgrade auxiliary heater - VW T7
Prices incl. VAT plus shipping costs
Ready to ship today,
Delivery time appr. 1-3 workdays
- Order number: 6308-001
Installation - complex

Use the Auxiliary heater of your VW-T7 as parking heater.
Suitable for the following vehicles:
- VW T7 Multivan - climatic (manual climate control)
- VW T7 Multivan - climatronic (automatic climate control)
Description
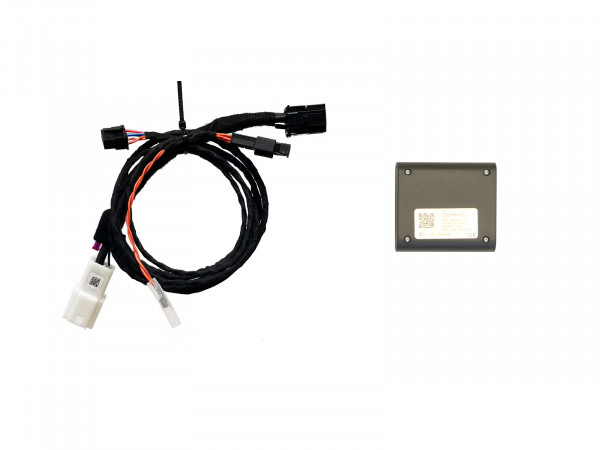
The DANHAG upgradekit converts an excisting auxiliary heater into a parking heater.
Easy connection due to vehicle specific connectors and wiring-looms.
- preheated coolant, avoid harmfull coldstarts of the engine during the winter moths.
- cosy, warm interior, pleasantly heated seats, and ice-free windows.
- no need to cut any orignal wires from the vehicle
- no need for any softwareupdates
- perfect for leased vehicles as the upgradekit can be removed completely.
Operating device
After installing the upgadekit, you can switch the heater with any analogue +12v Signal.
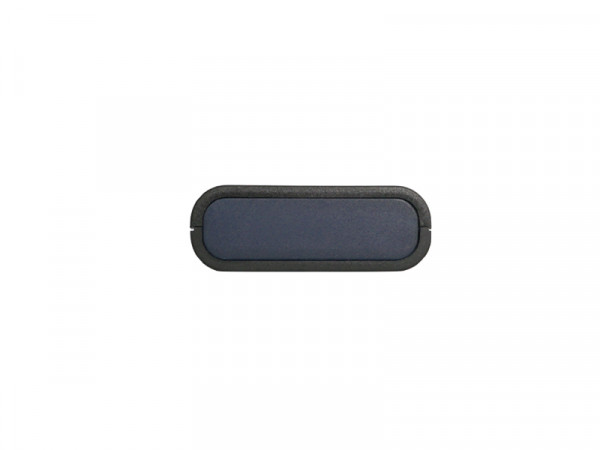
You can select an operating device during your order. This device as well as the suitable connection cord will be included into delivery.
APP-control
If you select "APP-control" you can control the parking-heater with your mobile-phone just by app or sms.
The danhag app-control support GSM, UMTS and LTE mobile-networks.
Technical data
- Voltage supply: 10 - 15 VDC
- Current consumption: Standby < 1 mA
- Dimensions: 63x60x22 (LxBxH)
Scope of delivery
- complete upgrade-kit auxiliary heater VW T7
- vehicle specific wiring harness
- installation- and users guide (via download)
- operating device (as choosen)
Does my VW T7 have an auxiliary heater which can be upgraded?
If there is a type plate at the right B-column as shown at the picutre below, your VW T7 has an auxiliary heater installed.

<h2>Einbau</h2>
<p>Die Zuheizeraufrüstung VW T6.1 besteht aus zwei Modulen.</p>
<p>Das Modul "ZH-T6.1" zur Eigentlichen Aufrüstung und Ansteuerung des Zuheizers und das Modul "Lüftung-T6.1" zur Ansteuerung des Innenraumgebläses.<br />Das Modul "ZH-T6.1" wird mit einem Y-Kabel unter dem Fahrersitz angeschlossen.<br />Das Modul "Lüftung-T6.1" wird mit einer Adapterleitung an den Stecker auf der Rückseite des Klimabedienteils angeschlossen.</p>
<p> </p>
<h2>Anschluss Modul "Lüftung-T6.1"</h2>
<h3>Ausbau Klimabedienteil</h3>
<p>Das Klimabedienteil und die Verkleidungen sind nur gesteckt, zum Ausbau empfehlen wir einen Hebel aus Kunststoff.</p>
<p><img id="tinymce-editor-image-c4599a23-0c75-4508-820c-3cbbe9734894" class="tinymce-editor-image tinymce-editor-image-c4599a23-0c75-4508-820c-3cbbe9734894" src="https://www.danhag.de/media/image/be/2f/0e/T6_1-Ausbau-Klimabedienteil.jpg" alt="T6_1-Ausbau-Klimabedienteil" data-src="media/image/T6_1-Ausbau-Klimabedienteil.jpg" /></p>
<p> </p>
<h3> </h3>
<h3>Anschluß Modul "Lüftung-T6.1"</h3>
<p>Das Modul "Lüftung-T6.1" wird mit der beiliegenden Adapterleitung an den Stecker angeschlossen.</p>
<ul>
<li>Um den Stecker lösen zu können muss zuerst die rote Verriegelung nach oben geschoben werden da sonst die "Entriegelungsnase" blockiert ist.</li>
<li>Anschließend entriegeln Sie den Steckereinschub und ziehen diesen seitlich aus dem Steckergehäuse heraus.</li>
<li>Pinnen Sie die gelbe und schwarze Leitung aus. </li>
<li>Pinnen Sie an diese Stelle die gelb/schwarze und schwarze Leitung der Adapterleitung ein.</li>
<li>Pinnen Sie die beiden originalen Leitungen in das Gegenstück der Adapterleitung ein (gelb gegenüber gelb und schwarz gegenüber schwarz).</li>
<li>Bauen Sie den Stecker wieder zusammen.</li>
</ul>
<p> </p>
<p><img id="tinymce-editor-image-5647c21e-8e6d-43ae-85cb-06005f3a74f1" class="tinymce-editor-image tinymce-editor-image-5647c21e-8e6d-43ae-85cb-06005f3a74f1" src="https://www.danhag.de/media/image/d4/3f/38/T6_1-Anschluss-Adapterleitung.jpg" alt="T6_1-Anschluss-Adapterleitung" data-src="media/image/T6_1-Anschluss-Adapterleitung.jpg" /></p>
<p> </p>
<p> </p>
<p> </p>
<h3>Anschluß Modul "ZH-T6.1"</h3>
<p>Das Modul "ZH-T6.1" wird mit dem beiliegenden Y-Kabel an den Stecker des Zuheizer in der Sitzkonsohle des Fahrersitz angeschlossen.</p>
<p>Schieben Sie den Sitz ganz nach vorn (California / Caravelle) oder ganz nach hintern (Multivan) um den Stecker besser erreichen zu können.</p>
<p> </p>
<p><img id="tinymce-editor-image-74570ec6-5bd9-42c9-9755-9468832ccdc9" class="tinymce-editor-image tinymce-editor-image-74570ec6-5bd9-42c9-9755-9468832ccdc9" src="https://www.danhag.de/media/image/15/c4/a0/VW-T6-Anschluss-CAN-Gateway.jpg" alt="VW-T6-Anschluss-CAN-Gateway" data-src="media/image/VW-T6-Anschluss-CAN-Gateway.jpg" /></p>
<p> </p>
<p> </p>
<p> </p>
<h3>Verbindung Modul "Lüftung-T6.1" und "ZH-T6.1"</h3>
<p>Das Modul "Lüftung-T6.1" wird vom Modul "ZH-T6.1" angesteuert.</p>
<ul>
<li>Verlegen Sie die Steuerleitung unter dem Teppich im Fahrerfußraum zum Klimabedienteil.</li>
<li>Pinnen Sie dort die rosa und grüne Leitung in den 12-poligen Stecker des Modul "Lüftung-T6.1" ein.</li>
<li>Schließen Sie den 12-poligen Stecker an das Modul an.</li>
<li>Befestigen Sie das Modul mit den beiliegenden Klettstreifen hinter dem Klimabedienteil.</li>
</ul>
<p> </p>
<p><img id="tinymce-editor-image-e2985ad7-20b1-430f-969d-5d12d4561055" class="tinymce-editor-image tinymce-editor-image-e2985ad7-20b1-430f-969d-5d12d4561055" src="https://www.danhag.de/media/image/67/b2/c8/T6_1-Anschluss-CAN-Gateway-Lueftung.jpg" alt="T6_1-Anschluss-CAN-Gateway-Lueftung" data-src="media/image/T6_1-Anschluss-CAN-Gateway-Lueftung.jpg" /></p>
<p> </p>
<p> </p>
<h2>Anschluss Bedienelement</h2>
<p>Das Bedienelement wird an die 6-polige Buchse des Moduls <strong>ZH T6.1</strong> unter dem Fahrersitz angeschlossen.</p>
<p>Dort kann auch die Spannungsversorgung für das Bedienelement abgegriffen werden.</p>
<p>Oben rechts: +12V, unten rechts: Masse</p>
<p>Prizipiell können Sie jedes Bedienelement verwenden welches ein +12V Ausgangssignal liefert. <br />Sie können die Spannungsversorgung des Bedienelements direkt vom 6-poligen Anschluss des CAN-Gateways abgreifen. Dort liegen +12V (max. 1A) und Masse an.</p>
<p><strong>APP-Steuerung</strong><br />Wenn Sie unsere APP-Steuerung BASIC verwenden konfigurieren Sie das Ausgangssignal bitte auf +12V.</p>
<p><strong>Multicontrol</strong><br />Wenn Sie die Multicontrol verwenden konfigurieren Sie bitte das Ausgangssignal auf "<strong>TT-Z / C / E Heater</strong>".<br />Wie Sie das Ausgangssignal der Multicontrol konfigurieren ist in der Artikelbeschreibung der Multicontrol unter dem Reiter "INFO" erklärt.</p>
<p> </p>
<hr />
<p> </p>
<p><strong>Hinweis Innenraumgebläse</strong></p>
<p>Wird im Standheizungsbetrieb der CAN-Bus "aufgeweckt" (z.B. durch das Betätigen der ZV oder durch das Öffnen einer Tür) schaltet das Gebläse aus.<br />Das Gebläse schaltet automatisch wieder ein wenn der CAN-Bus in den Ruhemodus wechselt. Dies kann bis zu 30s dauern.</p>
<p> </p>
<p><strong>Hinweis Wärmetauscher im Fond</strong></p>
<p> Bei Fahrzeugen mit zusätzlichen Wärmetauscher im Fond wird dieser im Standheizungsbetrieb mit angesteuert.</p>
<p> </p>
<p><strong>Hinweis Einstellung Climabedienteil</strong></p>
<p>Prinzipiell wird das Climabedienteil immer mit den Einstellungen aktiviert die vor dem Ausschalten der Zündung aktiv waren.<br />Damit die Frontscheibe im Standheizungsbetrieb abgetaut wird stellen Sie bitte <span style="text-decoration: underline;">vor</span> dem Ausschalten der Zündung das Gebläse auf Stufe 1 - 2 und die Luftführung auf die Frontscheibe.</p>
<p> </p>


